
Picking the domain is an important first step in getting your website and brand up. Getting a domain typically requires three steps:
- Choose a domain registrar that will register the domain on your behalf
- Find the domain you want (make sure it is available)
- Purchase your new domain
Step 1: Choosing the Best Domain Registrar
There are a lot of options when choosing your domain registrar. I always recommend NameCheap because it has a massive selection of domains, good pricing, 24/7 live support, and a great interface. It’s also nice to have any domains you own on NameCheap, and keep that separate from the hosting (unlike people who use GoDaddy and often purchase both the domain and the hosting). We will be going over exactly how to use Cloudways Managed Hosting instead, which is a much better option, in the second part of this series!
Step 2: Find the Domain You Want
Choosing the right domain name for your business can be a challenge. When purchasing a domain, you can basically register any domain name, as long as:
- It hasn’t been taken by anyone else
- It consists of only alphanumeric characters and hyphens’
However, not all domain names are created equal. There are several best practices to consider:
- You want the right domain extension. You should try to purchase a Top Level Domain (TLD) which would include .com, .org, ca, .co, .net etc. There are many more options to choose from which has made creative domains, but remember, you want to give an additional hint for your users with the domain extension. For example, if you are doing artificial intelligence, .ai is a good option to choose from.
- You want the domain to be easy to memorize and clear. Generally, the shorter the better. Try to avoid hyphens if possible. It should be some version of your business name to provide clarity to users.
- You need the domain to be legal to possess. If you are registering a domain, you don’t want to infringe on someone’s trademark. Make sure your domain doesn’t infringe and save yourself some trouble.
In order to see if your domain is available and what extensions are available for it, you will need to use a registrar to search. Again, this is where NameCheap is a great solution.
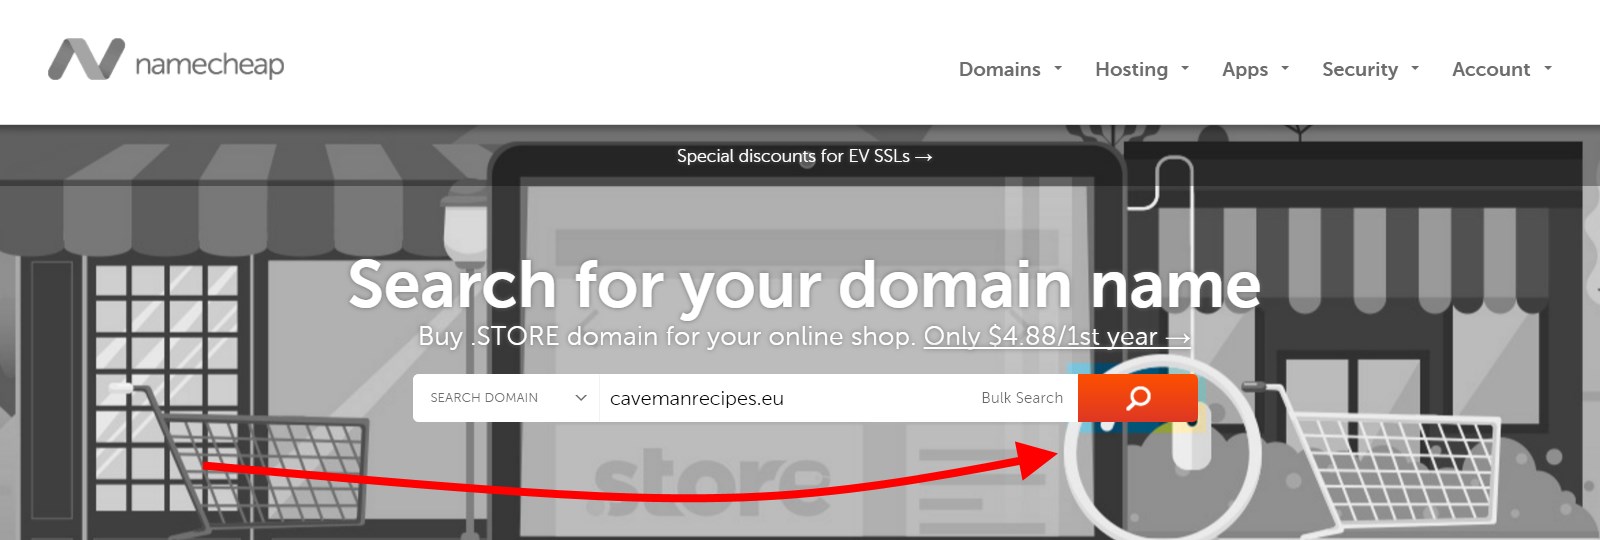
Go to NameCheap and type in your desired domain name.
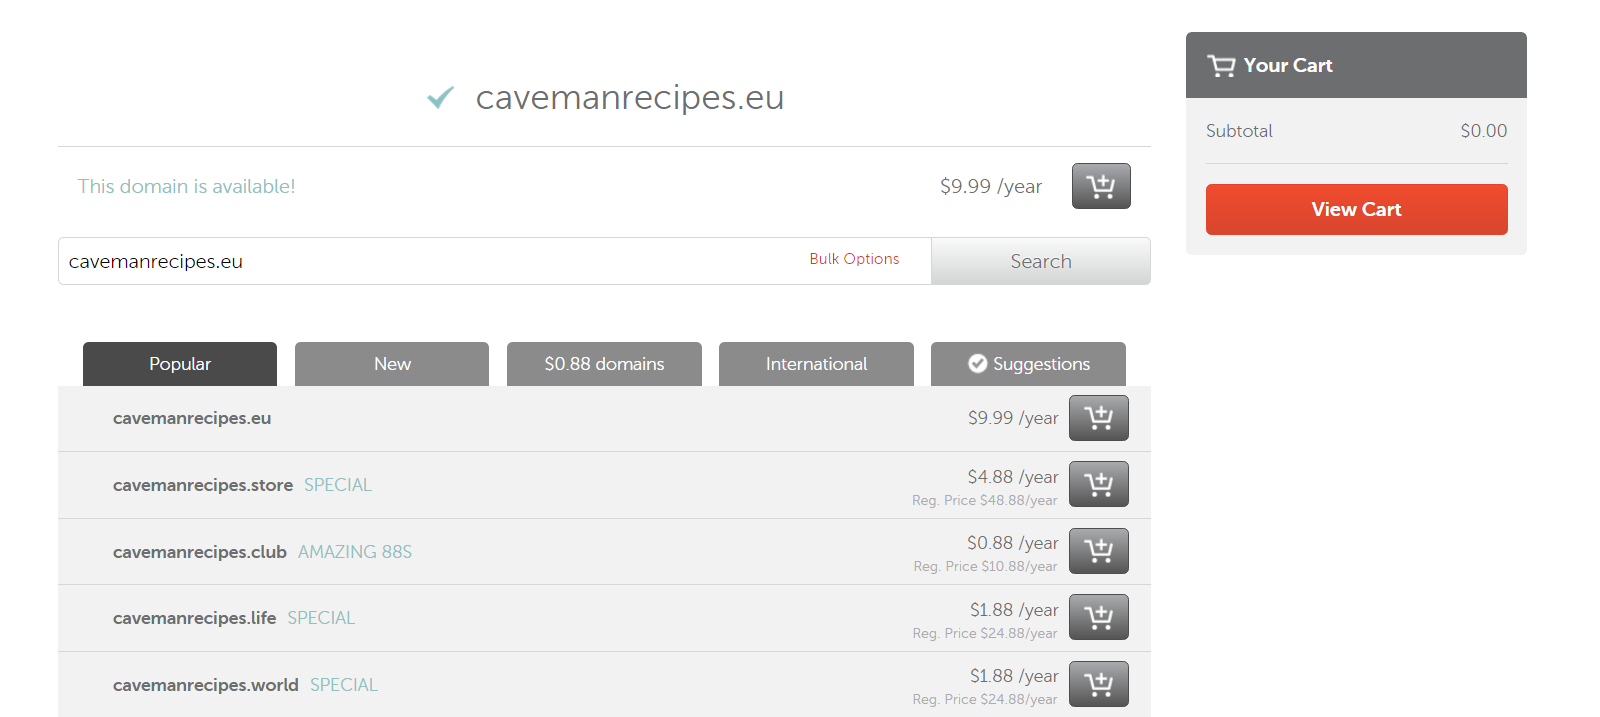
Review the available domains and pick the perfect one for your business.
Step 3: Purchase Your New Domain
With your name decided upon, your final step is to get your domain name registered and ready to use. As highlighted above, in most cases, NameCheap is the best option, and I will guide you through the purchase of a domain on their site.
Add the selected domain to the cart on NameCheap. Review the options. Typically, it is best to get the domain and select it for auto-renew.
Some of the more important details:
- You can register your domain for anything between one and ten years. Your choice.
- It’s advisable to leave the ‘WhoisGuard’ option enabled. It gives you complete anonymity and privacy for your most important personal information.

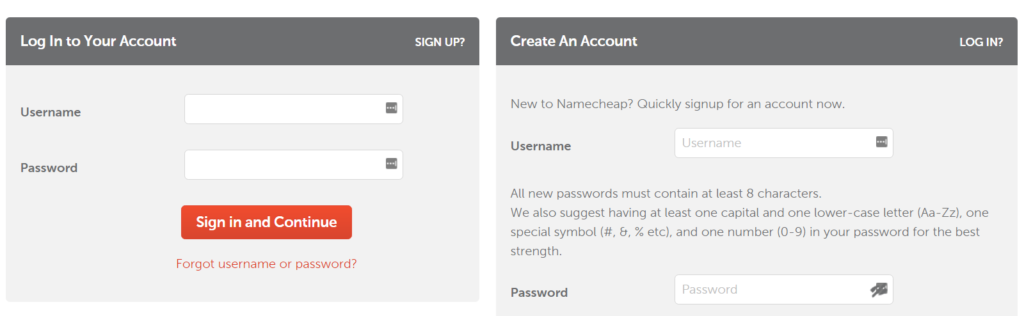
When you confirm your order, you will then be prompted to log in or create your NameCheap account (it doesn’t matter what order you do this in). You will see this:
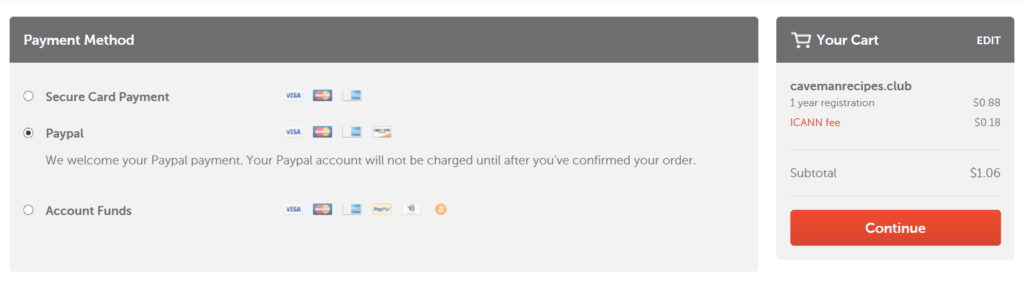
Now that you have logged in or registered, you just have to pay for the domain. You have a variety of easy options. Continue when ready and authorize!
You have now purchased your domain! You will get a “Thank You” page with the receipt for download. NameCheap, due to Internet Corporation for Assigned Names And Numbers (ICANN), you will just need to verify your domain purchase by email within 14 days. With that all done, your domain is now yours and ready to be used!
In Part 2, we go through the next crucial steps to getting your website online, including getting a fantastic website host and your WordPress application setup.