Introduction to Cloudways
Introduction to WordPress
WordPress is a Content Management System (CMS) that is free and open-source and widely used throughout the web, with over 310 million sites powered, including TechCrunch, The New Yorker, BBC America, and Bloomberg Professional. WordPress is customizable, easy to use, has a ton of great resources including step-by-step tutorials, and an excellent community and support. It also has a massive amount of powerful, pre-built themes, including visual composers, and extensive plugin options that allow you to add all kinds of styles and functionality. WordPress, like Cloudways, is a fantastic option for someone building a site, whether they are a beginner or experienced developer.
Getting Started
Before you can choose your server, select your application and deploy it, you will need a free Cloudways account. Get one here with my custom link: https://www.cloudways.com/en/?id=136650

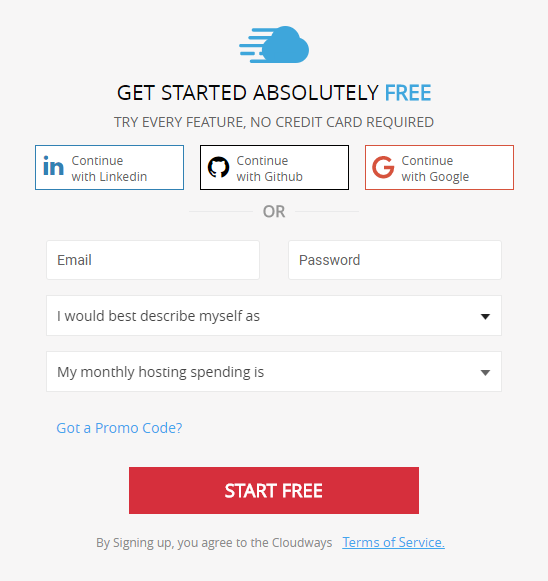
Click on the “Get Started For Free” Button. You will see the screen below. Fill out your details!
Installing WordPress on Cloudways
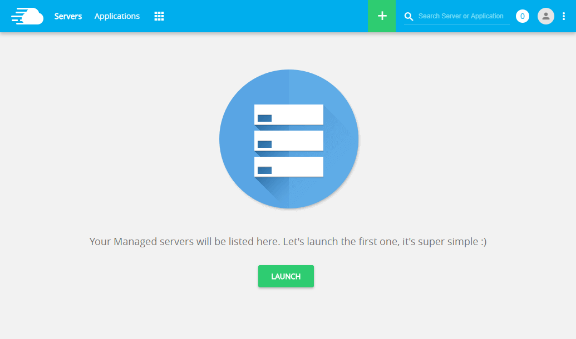
Once you have created your free account on Cloudways, it is time to choose your server and install WordPress. Log in to your Cloudways account and launch server for your site.
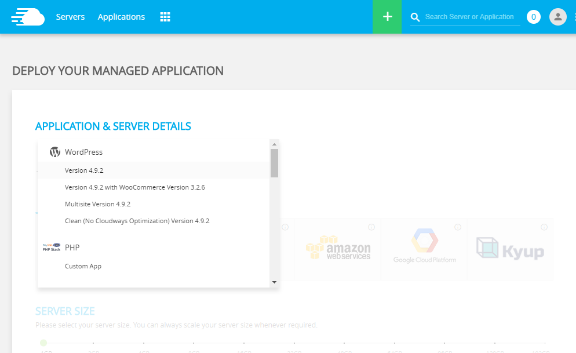
Hit “Launch” and it will enter the setup guide to get your server and WordPress application deployed. From the drop-down, you want to select “WordPress”. Select the first option from the drop-down, which will be WordPress only with the current version number. With the WordPress installation, you will get a free caching plugin called Breeze to help the performance of your site.
You will then name your application and server, which has been labeled “My WordPress” for the example.
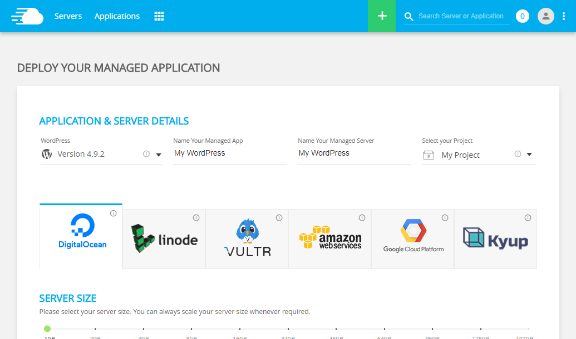
After, naming your application, you want to pick the right cloud hosting. For you, “DigitalOcean” is recommended. You do not need a DigitalOcean account to set this up, Cloudways manages everything for you.

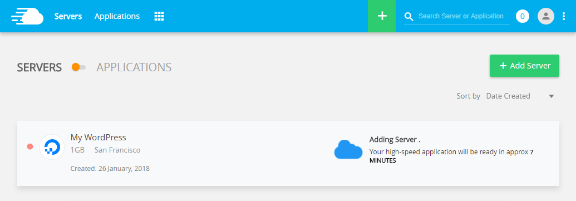
The smallest server size will work for now, and you want to pick the location that is closest to you, or where the majority of your traffic is going to come from. You’re all ready to go! Click “Launch Now” to deploy your server. You will see the server getting ready like in the screenshot below.
Managing the Application
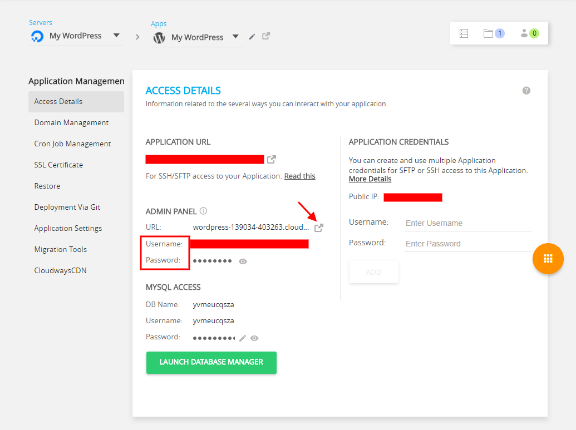
We have successfully deployed the server, so now it’s time to actually manage the WordPress application and access the backend. Click on ‘www’ and then select your application (identified by the name you gave it earlier when choosing the application to be installed).

This will bring up the Application Management screen. Here’s where you can control every detail and configuration of your newly installed application. You will see the temporary URL of your website, which you can then access by hitting the icon beside URL under “Admin Panel”, with the provided username and password.
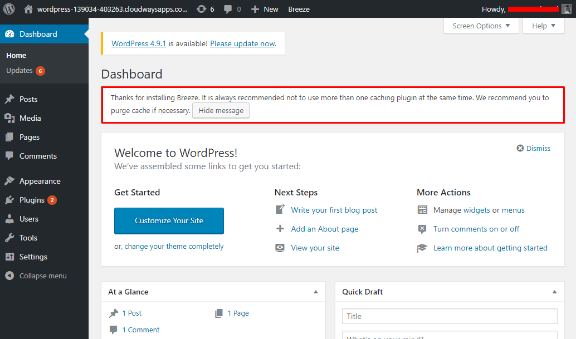
You then be redirected to the login page, which will be www.yourtemporarydomain.com/wp-admin. Add the username and password and you will see the backend of the WordPress dashboard as seen below:
You now have a fully setup server with WordPress installed and ready to go! Now it’s time to add a theme and create your first landing page. Head to part 3!